
The Convertible Reversible 4 in 1 Bag
This was my first ever pattern test. I was really thrilled to be included, especially as this is my year of doing new things. I had no idea what to expect, but it definately wasn't this. In for a penny, in for a pound though, and so glad I did.
Sarah has designed something very ingenious. It is put simply one bag, which can be converted into three entirely different looking bags.
Sarah has designed something very ingenious. It is put simply one bag, which can be converted into three entirely different looking bags.
I made up mine with the idea of taking it on my hols next month. Sarah suggests either laminated or quilting cotton. I am trying to use only my stash at the moment, and I didn't have any laminated cotton (actually I'd never heard of it until then - I was only aware of oilcloth which is TOO heavy weight to use for this. I have since bought some -> UK folks try Prints to Polka Dots for laminated cotton as they have some on offer right now)
As I said, I wanted to use this as a holiday bag because it means taking only one bag that I can convert for use on different days. As you may know, I am a big fan of quirky and colourful fabrics. After much chopping and changing I decided on the following 4 fabrics:


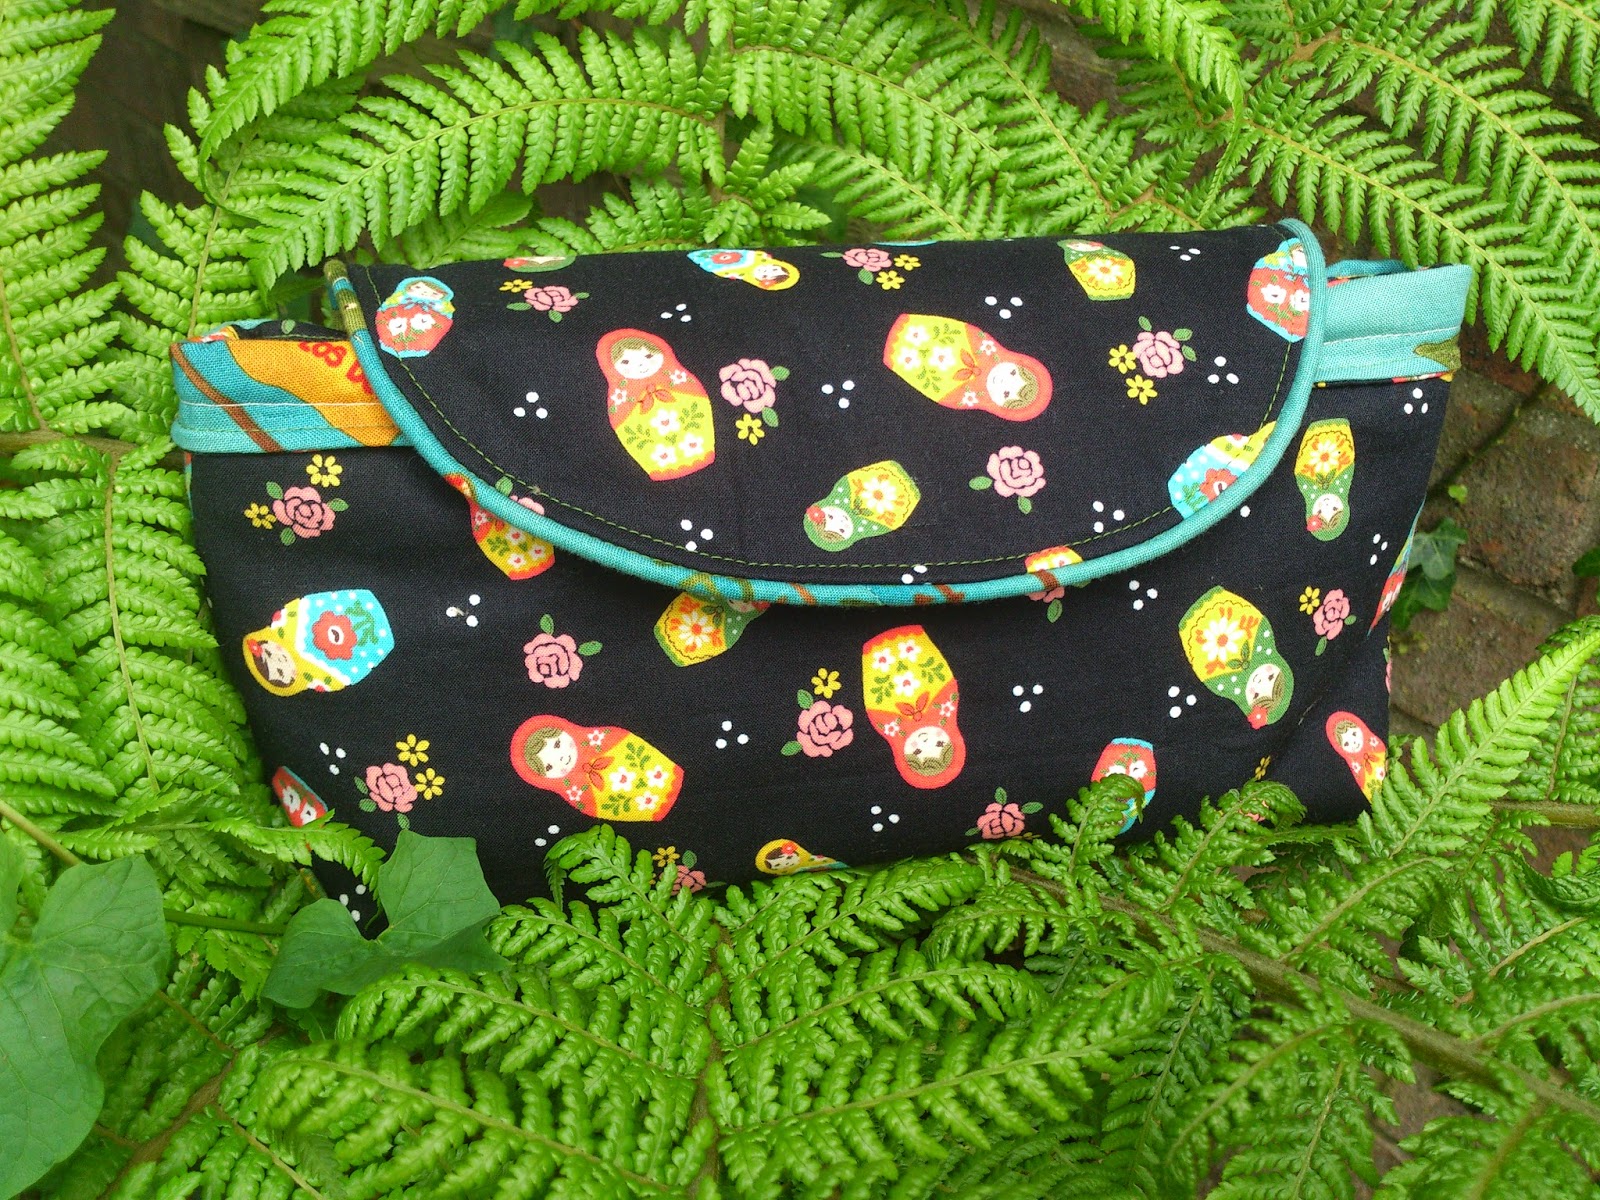
Bag 2 (Night bag) - I made two straps, one for each colourway as they are quite different, but you can just make one to match both to save time (and avoid losing the extra strap which I may be in danger of!).
In the latest version of the pattern I believe there are tips on fastening the flap for Bag 2 upwards instead of having it hanging down like this.

As I said, I wanted to use this as a holiday bag because it means taking only one bag that I can convert for use on different days. As you may know, I am a big fan of quirky and colourful fabrics. After much chopping and changing I decided on the following 4 fabrics:
Bag 1 I used the trailer travel fabric by Michael Miller and it has a generic red polka contrast. I think of this as the Day bag.
Bag 2 I used the remainder of some Matryoshka doll Kokka fabric I had
left, and scraps of one of my favourite ever fabrics, the Alexander
Henry Viva Frida in Teal. I think of this as the Night bag.
Bag 1 (My Day Bag) : Shows flap down, flap up, and in crossbody style and matching strap.
I think this is my favourite 'mode'
Bag 2 (Night bag) - I made two straps, one for each colourway as they are quite different, but you can just make one to match both to save time (and avoid losing the extra strap which I may be in danger of!).
In the latest version of the pattern I believe there are tips on fastening the flap for Bag 2 upwards instead of having it hanging down like this.
If you swing your eyes over to the right there in the 'Things I've made' section ->>>>> you will see a link to the photos I took whilst making it. Its not a tutorial - I haven't recreated Sarahs instructions, but it may be useful to reference whilst you are making up your bag.
I won't lie and say this bag isn't challenging - if you are a beginner to bagmaking it might well be too much for you to cope with. However I will say I have never been so satisfied as when I completed this sucessfully.
I found that slow and steady is definately the way to go.
I found that slow and steady is definately the way to go.
- Make sure you use the labels Sarah has provided as there are a LOT of pattern pieces. These are invaluable - if you can print them on sticky paper even better (I just pinned mine on)
- Don't worry too much about zip lengths - as long as they are wider than the bag you can cut them down to fit. Just don't cut off the zipper pull when you are trimming *yes - I went and did that the first time!
- If you can find cotton thread that matches both bags/all four fabrics, thats the way to go (I had to re-thread as I went back and forth from Bag 1 to Bag 2 and back)
- You need to concentrate that little bit harder with directional fabric (which I used for Bag 1) to make sure its the right way up. If this panics you - don't use directional!
- Stick to lightweight fabric - there are a lot of layers and it won't work with anything thicker.
- Enjoy it - as it comes together its fantastic.
I love your version. Both fabrics are fabulous but the side of the polka dots is my favourite it really makes the bag pop. I also love how you've provided a link to how you put the bag together. Good idea for future reference.
ReplyDeleteLynn, love your fabric chooses...especially the red polka dots :-)
ReplyDeleteLove the tips at the end of the post - i am thinking I should collect all the various tips from each stop along the tour.
ReplyDeleteVery cute. Directional fabric? Not the first time I made this bag, maybe the second time.
ReplyDeleteLove the bag - Love the Michael MIller fabric you used!
ReplyDeleteLove the bag
ReplyDeleteLove the fabric your used! I have some cool paisley print cotton...and solid color that matches...would use them both..definitely a casual look for both sides for me! :)
ReplyDeleteLove the fabrics you choose.
ReplyDeleteYour bag is lovely, I love that Matryoshka fabric.
ReplyDeleteI LOVE that Trailer fabric! It's perfect for the bag!
ReplyDeleteAmy
I think I would use Tula Pink fabrics. MAYBE I would use a little solid with it.
ReplyDeleteBlack and white text fabrics with lime green and grey would be the colours I would pick I think.... But I love navy and white too!!!
ReplyDeleteLove this bag! I would do a black or navy blue, but for the main fabric I would use some design fabric to match to give it a pop of color!
ReplyDelete