Showing posts with label Cozy Nest Design. Show all posts

Saturday, 12 September 2015

Bagmaking: The Layla Bag by Cozy Nest Design

I'm now what I consider a 'regular' tester for Sarah of Cozy Nest Design. Her mind works in incredible ways, and this latest bag, Layla, is no exception.

I had been fretting for ages about what bag to take to my mother in laws wedding, and when the testing call went out for this bag, I knew I had to make it.


Its such a clean, cute design. You can either make with, or without the metal handles (now stocked by Emmaline bags in Canada, but hopefully soon by Bobbin Girl in the UK) but for me there was no question of using them!

The pattern, as usual, is easy to follow. I wouldn't call it a beginners pattern though - more beginner to intermediate. I would tackle it if you have made a couple of bags already and know the basics.

I chose to add piping all the way around the gusset. This was kind of tricky due to construction and I would omit this the first time you make this bag if you're a beginner, so you know how the bag comes together.


It doesn't take too long to make either. This would be great for a night out. 


There is one inner zipped pocket which is always useful. The bag is plenty big enough to fit purse, keys, makeup. Even a pair of ballerina pumps!


In the end I didn't use the bag for the wedding due to a last minute outfit change. I did make it specifically to go with a dress and these shoes, but the shoes hurt too much. (I love Irregular Choice though. )


Monday, 29 June 2015

Bagmaking - The Motherload Tote (Cozy Nest Designs)


I was asked by Janelle of Cozy Nest designs, to pattern test her as yet unnamed sports tote (it has since been named!!)

When I saw the design, I absolutely said yes. 

I joined a gym a month ago and have been using an entirely impractical Cath Kidston tote, which is too small and only has one little pocket.

This baby has an outer zipped pocket, an inner zipped pocket. It has dual sections for your trainers/kit or you cossie/towels etc etc. It has a drinks bottle sling, and there is also the option to add straps to sling your yoga mat /towel underneath ( I didn't add these)


You can add a triangle clip to hang your car keys/sunnies from if you wish, and you can add anything else you want (I added this tiny pocket on the front for my gym card which I'm always losing - and it also fits my padlock)


I wanted something bright and cheery, so I went for this hello tokyo fabric on the outside, and a pre-laminated cotton on the inside because I wanted water resistant.

I used Lamifix on the outer cotton, which is an iron on laminate. It works, but it looks horribly creased all the time. I think I'd only use this on small projects in the future. The pre-laminated stuff is vastly superior looks-wise. 

However as this bag is for my personal use, I'm not too fussed! Its so flipping useful. I made the bottle sling slightly larger to accommodate my own bottle.


Sarahs instructions are always clear. I was slightly confused due to using directional fabric, however she has since added extra orientation details to her pattern to make this part easier to understand. This is not a beginners bag, but an intermediate sewer should tackle it easily. 

I also didn't make my top zip recessed. This is due to the bulk of having laminates on both in interior as well as exterior as well as interfacing. Also my seam allowances top and bottom were slightly larger than they should have been as the width of lamifix didn't quite reach (another reason not to use it on larger bags)

See more and purchase via CozyNestDesign here 

Friday, 27 March 2015

Pinup Girl Ellory Bag: Pattern Test

I was contacted by Sarah from http://www.cozynestdesign.com/ a couple of weeks ago to see if I wanted to participate in some bag testing.

I should have said no, because I have a lot of commissions to get through, and I know from the last pattern test from Sarah that her designs are wonderful, but fairly advanced.

I couldn't say no though. When I saw her test bag, I just really really wanted to give it a go. Its very bowling bag style i.e. a bit retro, a great roomy size, with three pockets.

This is a downloadable pattern. You do have to tape quite a few bits of paper together, then cut out the pattern pieces. If you aren't a big fan of doing that, then this is the worst bit (it was for me)

After that, it was relatively plain sailing. Sarahs patterns are clear and she provides checkboxes to tick off what you've done as you go!


I bought the fabric yonks ago - my first bag sale on Etsy was in this fabric ( it wasn't very good - see below - I didn't take fabric placement into consideration at all, but I'm improving all the time!)


I figured it needed using up. Plus the retro styling called for some retro fabric.

There are 3 pockets on this bag - one large inner pocket, and the sides also zip away to reveal pockets. Its roomy and perfect for a day out as you can fit a picnic in there! I added some D-rings on the side to add a shoulder strap if its needed.


Used a little gingham on the inside pocket to carry on that retro feel. Piping - who doesn't love piping? I'm fairly confident with adding this now, although it often takes a few passes of the needle to get it right!


This is quite a time consuming project. Slow and steady wins the race!


Which is the front and which is the back? Either or. Totally interchangeable!


Overall I'm moderately happy with my work this time. Its not as neat as I'd like because I didn't do the side pocket zips properly ( I folded the ends over - don't do that - just overlap them), so I won't be selling it as I hate to sell something not perfect. Its adorable though and I love it. 

As I said previously, Sarahs patterns are clear and well written. This is an advanced bag design, but a beginner can do it as long as they take it slow. 

The pattern is available from her site http://www.cozynestdesign.com/shop/ or from craftsy

Tuesday, 29 July 2014

Convertible-Reversible 4-in-1 Bag Tour and Giveaway (and 25% discount code)


The Convertible Reversible 4 in 1 Bag 

This was my first ever pattern test. I was really thrilled to be included, especially as this is my year of doing new things. I had no idea what to expect, but it definately wasn't this. In for a penny, in for a pound though, and so glad I did.

Sarah has designed something very ingenious. It is put simply one bag, which can be converted into three entirely different looking bags.

I made up mine with the idea of taking it on my hols next month. Sarah suggests either laminated or quilting cotton. I am trying to use only my stash at the moment, and I didn't have any laminated cotton (actually I'd never heard of it until then - I was only aware of oilcloth which is TOO heavy weight to use for this. I have since bought some -> UK folks try Prints to Polka Dots for laminated cotton as they have some on offer right now)

As I said, I wanted to use this as a holiday bag because it means taking only one bag that I can convert for use on different days. As you may know, I am a big fan of quirky and colourful fabrics. After much chopping and changing I decided on the following 4 fabrics:

Bag 1 I used the trailer travel fabric by Michael Miller and it has a generic red polka contrast. I think of this as the Day bag.
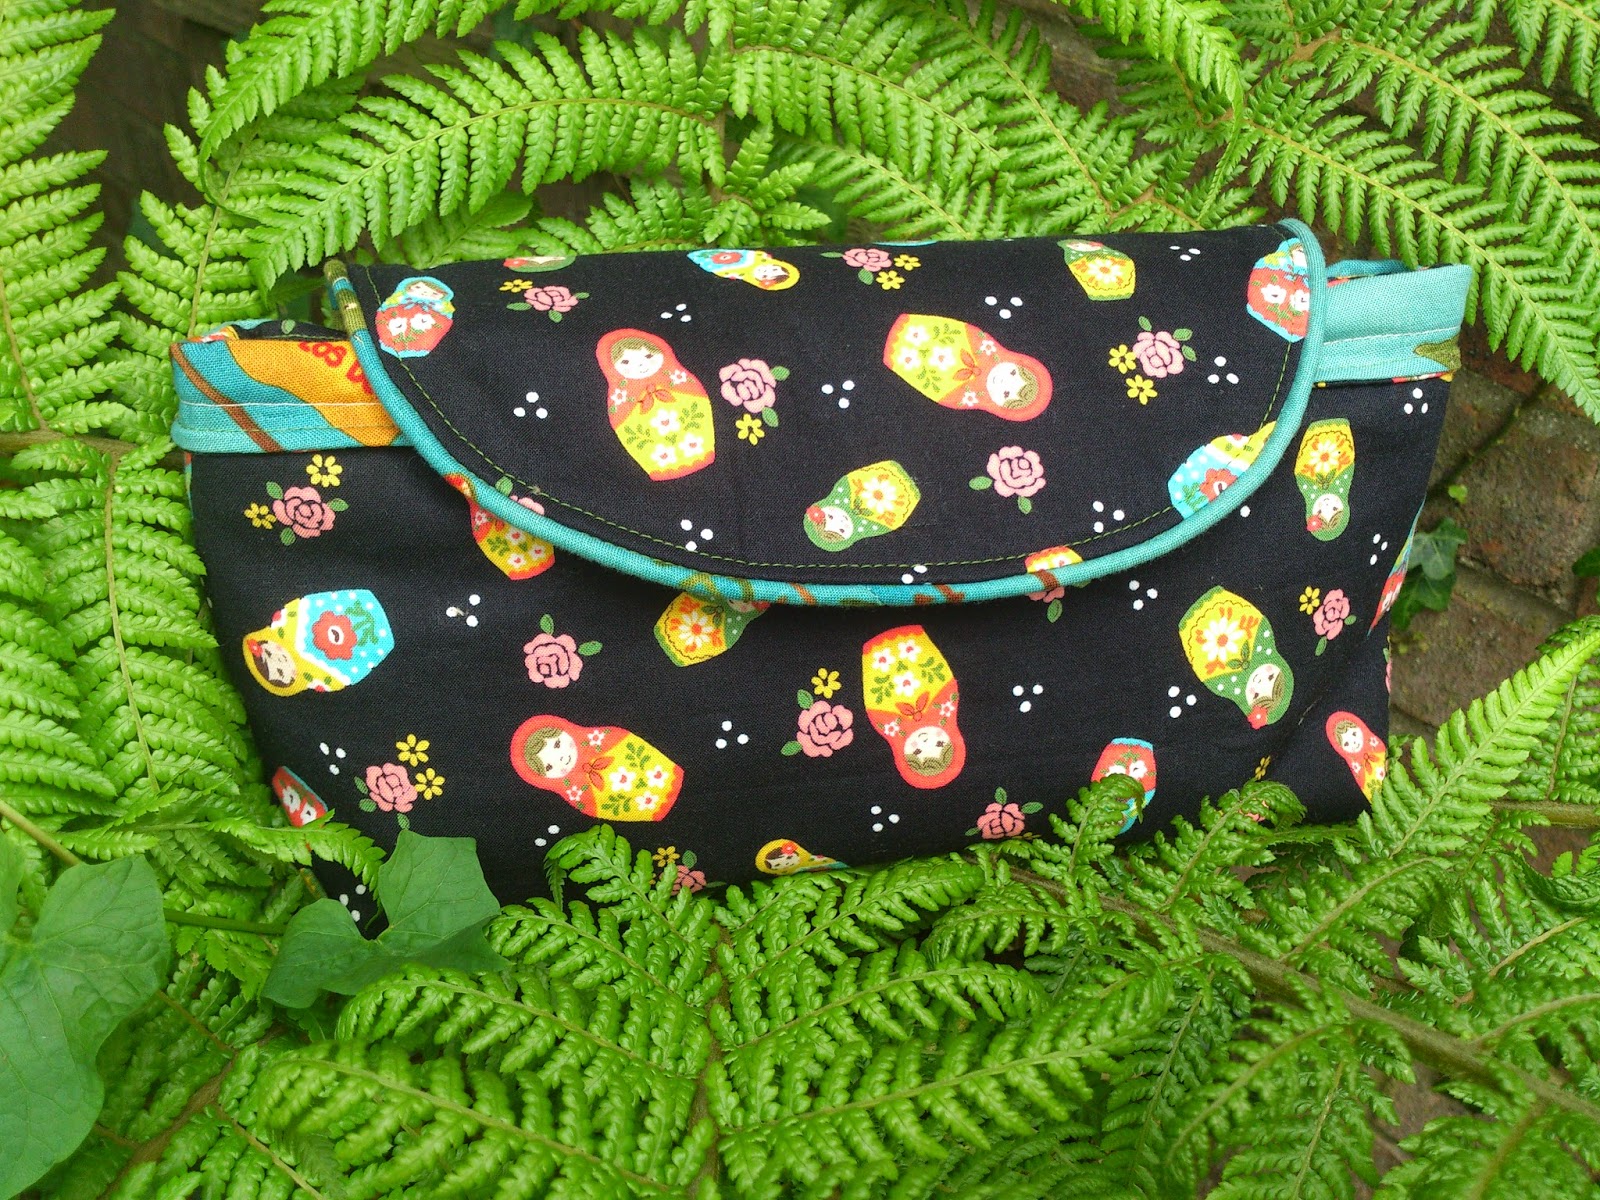
Bag 2 I used the remainder of some Matryoshka doll Kokka fabric I had left, and scraps of one of my favourite ever fabrics, the Alexander Henry Viva Frida in Teal. I think of this as the Night bag.


Bag 1 (My Day Bag) : Shows flap down, flap up, and in crossbody style and matching strap.


I think this is my favourite 'mode'


Bag 2 (Night bag) - I made two straps, one for each colourway as they are quite different, but you can just make one to match both to save time (and avoid losing the extra strap which I may be in danger of!).

 In the latest version of the pattern I believe there are tips on fastening the flap for Bag 2 upwards instead of having it hanging down like this.


If you swing your eyes over to the right there in the 'Things I've made' section ->>>>> you will see a link to the photos I took whilst making it. Its not a tutorial - I haven't recreated Sarahs instructions, but it may be useful to reference whilst you are making up your bag. 

I won't lie and say this bag isn't challenging - if you are a beginner to bagmaking it might well be too much for you to cope with. However I will say I have never been so satisfied as when I completed this sucessfully.
I found that slow and steady is definately the way to go.
  • Make sure you use the labels Sarah has provided as there are a LOT of pattern pieces. These are invaluable - if you can print them on sticky paper even better (I just pinned mine on)
  • Don't worry too much about zip lengths - as long as they are wider than the bag you can cut them down to fit. Just don't cut off the zipper pull when you are trimming *yes - I went and did that the first time!
  • If you can find cotton thread that matches both bags/all four fabrics, thats the way to go (I had to re-thread as I went back and forth from Bag 1 to Bag 2 and back)
  • You need to concentrate that little bit harder with directional fabric (which I used for Bag 1) to make sure its the right way up. If this panics you - don't use directional!
  • Stick to lightweight fabric - there are a lot of layers and it won't work with anything thicker.
  • Enjoy it - as it comes together its fantastic.

DISCOUNT CODE:

25% off until 2nd August 2014 use 'bagtour'

GIVEAWAY:

a Rafflecopter giveaway

Blog Tour Participants

Monday, July 28th
Maria of Mia's Creations 
Niki Stringer of Roonie Ranching 
Alyssa Carrion at Keep Calm & Carrion

Tuesday, July 29th 
Lynn Potts of PottsCrafty 
Marilyn Brandt at Shades of Bold

Wednesday, July 30th 
Vicky Myers of Vicky Myers Creations
Liz Schaffner at MOMENTS

Thursday, July 31st
Amy Macdonald with Friends Stitched Together 
Judith Clauss of Judith Stitches and More

Friday, August 1st 
Jonie Brooks with Knot Sew Normal 
Lorena Rey of my way of... 
Bethany Rapp with Sweet Bee Buzzings


Friday, 20 June 2014

The Convertible/Reversible Bag


So here we have the reveal of the bag I made most recently. I have been pattern testing for Sarah of https://www.facebook.com/pages/Cozy-Nest-Design. This pattern will be available for sale on 30th July on www.Craftsy.com. 

Have a look at the Cozy Nest facebook page for other pattern tester creations and also here http://www.cozynestdesign.com/

Its the most amazing piece of construction. As you can see, it can be worn 4 ways which means only one bag required for my hols! 

I made this up in cotton as that's what I have in my stash, but it has also been made up in laminates by a number of people and looks fab that way too. 
I'm happy to take commissions for this bag via my fb page. Contact me for details x